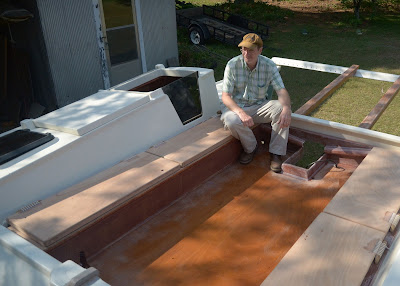
Today was one of those pivotal points in building a boat, like turning a hull or first connecting together the two hulls of a catamaran. The big deal today was that I was able to actually sit in the cockpit for the first time, which makes it actually feel like a boat, rather than a collection of parts. My friend and long time canoeing buddy, Ernest Herndon came over for the afternoon, and I enlisted his help in moving the cockpit around to the boat and lifting it into place on the beams. Then we had a couple beers on board while I made some measurements and marked things that needed marking while all this was temporarily assembled. One thing I checked was the bimini frame that I salvaged off my old boat, Intensity. Much to my delight, I discovered that it will work with some modifications and widening of the bows by use of splines. This will save me several hundred dollars and with my Sailrite sewing machine, I should be able to duplicate the old cover in whatever new color of Sunbrella I choose for Element II. No photos of the bimini, as we were too busy holding it up to use the camera, but here I'm testing out the helmsman's seat to starboard.
Ernest is more a river person than an ocean sailor, and didn't care for sailing on my rolling monohull when I had it, but did like the Hitia 17. He seemed to approve of all the deck space on Element II and I'm sure he will like the smoother motion.
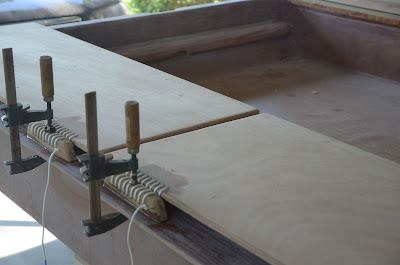
Before I could test fit the new seats/hatch covers, I had to fabricate and install the hinges that attach them to the side flanges I made to span the gap between the cockpit and the hulls. I wanted to use the lashing method, just like the rudders, so I made the vertical parts out of teak and the horizontal parts right in the plywood, using epoxy inserts just as I did on the rudders. Here is a shot showing the teak parts being glued down to the flanges. The lashing will be removed for finishing and painting:
These rope hinges are really slick. The are rock-solid, quiet in operation, and look really cool:
This aft compartment to starboard will house the ship's batteries. You can see the large PVC outlet that will carry the wiring into the starboard hull to the circuit panels.
On the port side of the cockpit, the aft locker will hold the fuel tanks for the outboard. I've bulkheaded this one off from the forward locker to port so there is no wiring inside the fuel locker. The locker will also be properly vented and is fitted with a drain, unlike the other three. Here you can see how the fuel line is routed through the PVC tube glassed into the aft end of the cockpit, to get it to the outboard well and keep it from underfoot. This locker will hold three of the standard 3-gallon Nissan fuel tanks:
I didn't want to have to do it, but while Ernest was here to help, we removed the cockpit again and moved it back to the carport where I will do the final fairing and painting. The seats have to be glassed as well, then once they are painted they will be rejoined to the side flanges with lashings. These side flange assemblies work great, and will allow me to remove the seat covers in one unit per side and stow them in the cabins when the boat is trailered for launch, reducing the weight of the cockpit.
Wednesday, June 06, 2012
Subscribe to:
Post Comments (Atom)


3 comments:
Looking very slick !!!! Two Thumbs UP!
What do you thing about , do one ice box in cockpit seat? I will do one.
Roger, yes you could build one in one of the seat lockers. David did this on the Tiki 30 Abaco. It will be small if you use thick foam, but it works. For my boat I think I will use one large portable ice chest inside the cabin on the galley hull. The Tiki 26 has a space aft of the cabin bulkhead this will slide into out of the way.
Post a Comment