Showing posts with label crossbeams. Show all posts

Sunday, May 06, 2012

Painting

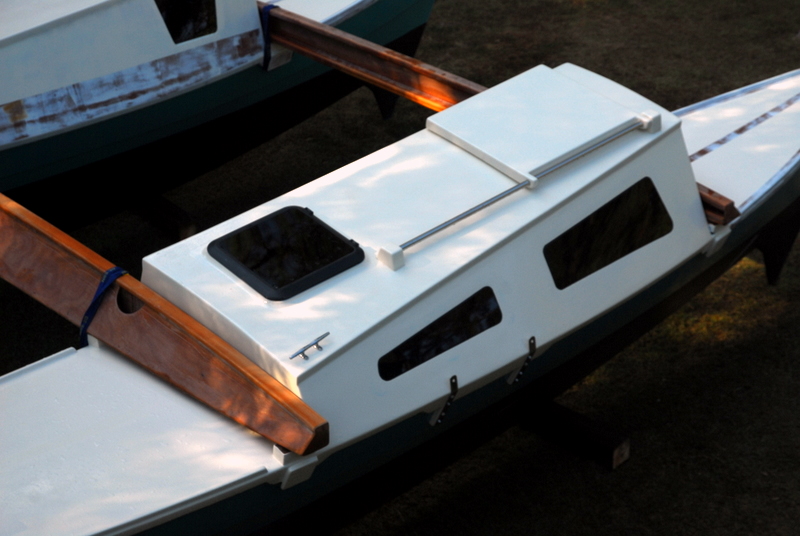
I'm in the process of painting various parts at the moment.  Here are a few photos of the crossbeams.  This first shot shows the aft beam and the additional net beam.  You can see the holes that have been drilled in the trampoline rails for the two rear tramps.  I've also worked out the details on the aft ladder and have just finished building and glassing the ladder support rails.  The two small blocks you see near the center of each of these aft beams are chocks to lock these support rails in position.


The other beams have been pained as well.  In addition to my own beams, in the shed next to the boat I have another complete set that I am glassing and fairing.  I built these on contract for a friend who has a Tiki 26, along with new rudders.  I'll post photos of those parts soon.


Tuesday, January 24, 2012

Great Weather for January

It's been unseasonably warm here for this time of year, so I've been taking advantage of the good conditions to move forward with the cockpit sheathing and other epoxy work.


I completed the under-seat storage boxes that I added to the cockpit last week.  All the interior joints have been filleted, a fairly big job with a surprising 56 linear feet of fillets to make, counting the vertical joints and both sides of the center dividing partitions.  Those interior compartments will also get fiberglass sheathing, but first I wanted to flip the cockpit over and glass the exterior.  This will allow me to safely move it around to the boat and hang it in place for a final measurement before continuing with the seats that will also serve as hatch covers for the compartments.

All exterior corners were first rounded over with a router and filling and fairing completed where necessary.  As you can see, there is a small "chine" on each side of the bottom where the bottom panels of the side boxes overlap the main cockpit floor by one inch.  I did this to for ease of assembly when adding the side compartments and for additional stiffness and strength.  The overlap required a fairing fillet to allow the glass to transition smoothly from one surface to the next.  I've also wrapped the end support ledgers on the forward and aft ends of the cockpit in glass, bonding them to the panels with a strip of glass cloth that transitions from the bottoms of these to the panels over a small fillet.  The bottom of this cockpit is so big the sheathing has to be done in stages - at least for someone working alone.  I'm using 6oz. glass cloth in a 50-inch width.


Here's a view from the aft end of the cockpit, and you can see I've also moved the forward deck into the carport to get it out of the weather so it can be completely sanded and then treated with an oil finish.  The cypress deck has been exposed to heat and cold, sun and rain since I built it in October, so this allowed me to see how the wood was going to hold up and revealed a couple of bad planks that are wanting to check.  I'll replace those, but everything else looks great.


Here is the finish that will be applied to the deck:  Deks Olje D.1, as recommended by my friend David Halladay, of Boatsmith.  This is a saturating oil that is applied in multiple coats until the wood cannot soak up any more.  It will preserve the natural color of the cypress and help prevent checking and other problems, while still giving the footing advantages of a raw deck.


Other ongoing projects include finishing up the beams.  Since I added the forward deck, I had to make and install lashing pads on the mast and forward beams to support the longitudinal stringers under the center of the deck, and these have to be glass sheathed, faired and painted.  On the aft beam, I've added a ledger/rail on the aft side of the beam that will support the central boarding ladder and its rails and provide a place to drill lashing holes for the aft trampolines on either side of the ladder.  The rail is teak so that holes can be drilled without worry about rot.  The entire assembly is wrapped in glass and bonded to the beam fairing and bottom.


On the inboard sides of the hulls, I've glassed in 1-inch by 3/4-inch Doug fir stringers that will support the side flanges that will mate up to the cockpit edges at the level of the seats.  There are many different possibilities when it comes to how to join the cockpit sides to the hulls.  I had a long discussion with David about some ideas on this the other day.  An issue is that in rough conditions or at speed, water comes up through any gap in this transition, so the gap needs to be minimal, but tolerances cannot be so close that assembly and disassembly becomes too difficult.  Drainage for rain and spray running down the inboard sides of the cabins also has to be taken into consideration, especially if you intend the under seat lockers to be dry storage, as I do, rather than wet lockers with drains.  I have some ideas I'm still working out on this transition and the design of the locker lids/seats.  I'll make a final decision as soon as I can hang the cockpit back on the boat after I finish glassing the outside.  Here's a view of one of the inboard stringers:


Thursday, August 11, 2011

Planing Deck Lumber and Building Parts for Another Tiki 26

I spent the afternoon surfacing all the cypress lumber that will be used for the slatted forward deck and aft boarding ladder.  This is something I planned to do a long time ago, but just got around to it.  It was a big job with my little 13-inch bench-top planer:


It's getting hard to find clear cypress like these select planks that are 8 and 12 feet long.  Even this stuff has a few knots and splits, so I bought and processed more than I think I'll need to get all the support rails and deck planks out.


Good cypress like this is not cheap, but it's a whole lot less than teak, and while it might not look quite as good or last as long, it's also much lighter weight than teak and I think it will certainly make for a nice deck.

The other thing I've got going on out in the boat shed is a paying job building Tiki 26 parts.  These are for a friend who is refitting his Tiki 26 in preparation for extensive cruising.  I've contracted to build two new rudders, the mast and the three connecting beams.  Yeah, I know I said before that building these Tiki 26 style beams is a major pain because of the difficulty of glassing them, but here I go again - building another set exactly to plan.  Here are all the center webs:


The cutting and assembly of these goes fairly fast.  It's all the filleting, glassing, fairing and sanding that seems to take forever - just like everything else on these boats.  In a couple more days, I'll have all the basic assemblies done:


Here you can see I've cut the rudders out of a sheet of 18mm Joubert ply.  Since I still have not hung my own rudders, also shown, I was able to use one of them as a pattern.  


 This job will of course cut into my building time, but will also add funds to my project.  It's a welcome change of course, from all the book writing I've been doing.  I just finished up the final revisions for my latest book that will be released in October, but I have a deadline for the next one looming in less then 6 months.  My plan is to work on my own boat alongside the construction of these parts, and hopefully complete the cockpit and decks and get the mast stepped during that time period.  

Sunday, May 01, 2011

Beam Sheathing is Finished

At last tedious work of wrapping all the beam parts in fiberglass is finished.  I'm now in the process of fairing and priming them:

Here are a few photos showing some of the steps in sheathing the webs, top plates and front fairings:

This photo shows the front beam to the left, with the custom anchor roller brackets I made, and the aft beam to the right.  In the middle is the much smaller aft netting beam.  The mast beam is holding the hulls together, so I have to swap them around and work on two at a time while one is on the boat.

Fairing all these surfaces is multi-step process of sanding and applying epoxy fairing compound.

At this point in the build, I've come to rely on these tools for just about all filleting and fairing:  They are all flexible blade drywall/putty knives of various sizes.  The round ended ones like the one shown here are made by shaping these cheap blades with a belt sander.  After using cardboard, wood, plastic and other filleting tools, I've discovered these work best and make the neatest fillets.  Best of all, they can be used indefinitely if you either wipe them clean when the epoxy is still uncured or sand it off afterward.

Right now, the partially-assembled cockpit box is serving as a work table and catch-all space for tools and supplies:

Here's a couple of shots of the aft netting beam, which still looks rough because it needs a lot of sanding:

I've added lashing cleats to the inboard sides of the hulls at the sheer stringer.  Since it is not part of the structure holding the hulls together, this beam will only get lashed on the inboard side.

Tuesday, April 12, 2011

Some Overdue Photos

I meant to post this months ago - a neat photo of the assembled boat that my sister took with her cell phone camera.  I like the way this turned out:


Despite the lack of posting here, some progress is still being made.  Lately this has been work on the three main beams and the aft net beam.  I've had fiberglass sheathing and fairing to do on all of these, as well as building added parts that go on them like the mast step.  Looking back at my last post that included photos, I realized too that I never got around to posting cockpit pictures.  I did get the foam sandwich floor for the cockpit laminated last fall, and most of the basic box is built.  I have yet to build the under seat storage boxes and complete the motor mount. I need to take more photos of the assembled cockpit, but here are some showing the beginning of laminating the foam core to the plywood skins:

First, I glued solid wood spacers around the perimeter and the motor well cutout.  Solid blocks were glued into the corners where scuppers will later be drilled.  All these wood parts are made of cypress.


Then, the 3/4" Divinycell  foam was cut to fit within the borders, and plenty of holes were drilled in it to allow excess air to escape during the lamination process.


I used everything heavy I could find for weights to hold it in place while the epoxy cured.  It takes a lot of evenly spaced weights to insure that the air is squeezed out and the foam is in good contact with the plywood gluing surface.


The top layer of 4mm plywood was then glued on after this cured.  I didn't get photos of that though.  Other work I've been doing lately is all the tedious glassing of beam surfaces and the add-ons like the anchor roller on the forward beam, shown here with unsanded fairing compound:

Here's a shot of the teak mast step, almost complete except for some final shaping and reinforcing fillets. 


These old style Tiki 26 beams take forever to sheath in fiberglass because of all the unnecessary exposed surfaces.  I would advise anyone building a new Tiki 26 to incorporate the newer Tiki 30 beam design, in which all the structural parts are inside the plywood panels, making for a smooth, triangular surface that is about 10 times easier to glass!  But one day in the near or far future, I will at last have these beams glassed, faired and painted. 

Monday, September 27, 2010

Beams Meet Hulls!

Hey, check it out, this thing I've been building all this time really is a catamaran!


Yesterday, I brought the crossbeams from the garage where I built them down to the shed where the hulls were built.


Today the hulls were rolled out into the open and aligned in the middle of the space between the shed and the house, where I have enough room to work and to step the mast later when it's time for that.  I leveled them and blocked them up using the two-wheel carts I made and a hydraulic floor jack. 

  
All this went surprisingly well, even single-handed, again making me glad I went with the Tiki 26 instead of a larger design.  I can easily manipulate these hulls for maintenance in the future.


These beams are still unfinished, of course.  I have a bit of glassing and lots of fairing to do before painting them, as well as the completion of the extra bits for the mast beam, such as the mast step reinforcement and the dolphin striker.


At this point, the beams are just strapped onto the inside lashing cleats to keep everything level and secure.  I will use rope lashings as in the plans for the final assembly.  The beam blocks on the decks will have to be shaped to fit the underside of the beams for a secure contact surface.  This could not be done until I reached this stage where the hulls are aligned and leveled with each other.  Before the final fitting, I'll fine tune everything with a water level to be sure they are exactly level at all four ends. 


Another project will be finishing the paint job on the stern decks, which have non-skid and primer, but no finish coats.  Then I'll hang the rudders and paint them in line with the bottom paint and topside paint.  And then build the tillers and the tiller bar.


And, there's the small matter of the cockpit and cockpit seats with storage under, and the motor well.  Then forward decks, aft boarding ladder, tramps, etc....  But it's starting to look like a boat, and that's inspiring.


Monday, May 25, 2009

Yes, I'm Still Alive....

But despite the title, I'm making no apologies for not posting here for two months. I've been incredibly busy with other writing and computer projects, not to mention my other carpentry work besides working on my boat. This has been a period of many new ideas and opportunities that I have had to take action on. Work has continued on Element II, although at a more sporadic and slower pace. I'm not concerned about time frames however. Since the beginning I've known how I wanted to build this boat and the quality standards that I have to adhere to, so there is no particular rush to speed things up in time for some arbitrary launch date. When it's ready it will go in the water, and not before. That being said, a lot has been completed on this project and an awful lot remains to be done. The best way to build a boat is to enjoy the process, and that I have done from the beginning.

I don't have a lot of new photos to post today, as much of what I've been doing is tedious filling and sanding in the fairing process. A small project has been making and installing the crossbeam locating blocks on the decks, as you can see below.

I cut these out of some heavy teak boards David gave me on one of my trips to work for him in the Boatsmith shop. One still had the bark on one side. I made these beam blocks just a little thicker than on the plans, adding almost an inch to the height above the deck so that the top of the mast beam will be closer to the level of the raised fronts of the cabin tops. An added advantage is that extra bit of clearance this will provide for the cockpit over the water.

The blocks are squared off on the top now and matched to the contours of the deck where they are epoxied and screwed in place with large countersunk SS screws. When the boat is spread to assembly width and the beams are fitted, I can grind the top profiles of the blocks down to match the undersides of the beams. Meanwhile, the sides of the blocks and all the rest of the deck surfaces can now be primed and painted.

Last week, while working on a residential carpentry project, I scored a great find for my boat in the form of an abandoned aluminum tube that will be just right for making the stern net beam. The owner of the house gave it to me, as it was going to the dump if I didn't want it. It's 14 feet long, 3 1/2" in diameter, and has a wall thickness of 4mm. Cut down to length and capped off on the ends, it should be perfect for the net beam and will save me the labor of laminating one out of wood. I'll have to prep and prime it, of course, so that it can be painted, but at least its one more part I won't have to build from scratch.

Tuesday, January 06, 2009

Shaping and Glassing the Rudders, More Beam Glassing....

I spent most of the holidays away from the building shed where I have the hulls, but I was able to get back to work on some of the parts I have stored in my girlfriend's garage. As detailed in a post long ago, the rudders have been drilled for lashing to the sternposts and epoxy insets made to prevent rot from the lashing holes. The main rudder blades for the Tiki 26 are cut from 18mm plywood, with 6mm doublers on each side in the upper area above the waterline to the top of the posts where the tillers fit on. The lower sections of 18mm ply have to be sanded down to a hydrofoil shape on the trailing edge to decrease turbulence. This was accomplished with a belt sander first, and then the random orbital sanders shown below. The glue lines between the layers of ply serve as a guide in maintaining a consistent thickness.

Here the rudders are resting across the three crossbeams while the first coating of epoxy cures.

You can see the sanded tapers and the epoxy insets with lashing holes drilled.

Cold weather forced me to move the rudders inside for fiberglass sheathing. I'm fortunate that Michelle is a creative person who always has projects going in her studio and doesn't mind an occasional boat sub-assembly in the house.

In the photos below the fiberglass sheathing on the lower blades of the rudders has been laminated with epoxy. The upper areas with the doublers will be sheathed as well. The corners on the upper parts are well-radiused to receive sheathing all the way around. Every ply part of the boat that is exposed to the sun will be sheathed in 6-oz. fiberglass.

Back in the garage I worked on the crossbeams as well. Sheathing them is a multi-step process because of all the surfaces involved.

This application of fiberglass is on the top plate of the forward beam. Masking tape put on in advance of the fiberglass and epoxy defines the edge and allows it to be cut straight. The next application of fiberglass on this beam will overlap the edge of this layer and extend down over the front plywood fairing, wrapping around the leading edge to the bottom. The sheathing involves lots of steps and filling the weave and fairing all this out will be a considerable amount of labor as well, but worth it to prevent possible checking and water intrusion into the beams.