Monday, September 27, 2010

Beams Meet Hulls!

Hey, check it out, this thing I've been building all this time really is a catamaran!


Yesterday, I brought the crossbeams from the garage where I built them down to the shed where the hulls were built.


Today the hulls were rolled out into the open and aligned in the middle of the space between the shed and the house, where I have enough room to work and to step the mast later when it's time for that.  I leveled them and blocked them up using the two-wheel carts I made and a hydraulic floor jack. 

  
All this went surprisingly well, even single-handed, again making me glad I went with the Tiki 26 instead of a larger design.  I can easily manipulate these hulls for maintenance in the future.


These beams are still unfinished, of course.  I have a bit of glassing and lots of fairing to do before painting them, as well as the completion of the extra bits for the mast beam, such as the mast step reinforcement and the dolphin striker.


At this point, the beams are just strapped onto the inside lashing cleats to keep everything level and secure.  I will use rope lashings as in the plans for the final assembly.  The beam blocks on the decks will have to be shaped to fit the underside of the beams for a secure contact surface.  This could not be done until I reached this stage where the hulls are aligned and leveled with each other.  Before the final fitting, I'll fine tune everything with a water level to be sure they are exactly level at all four ends. 


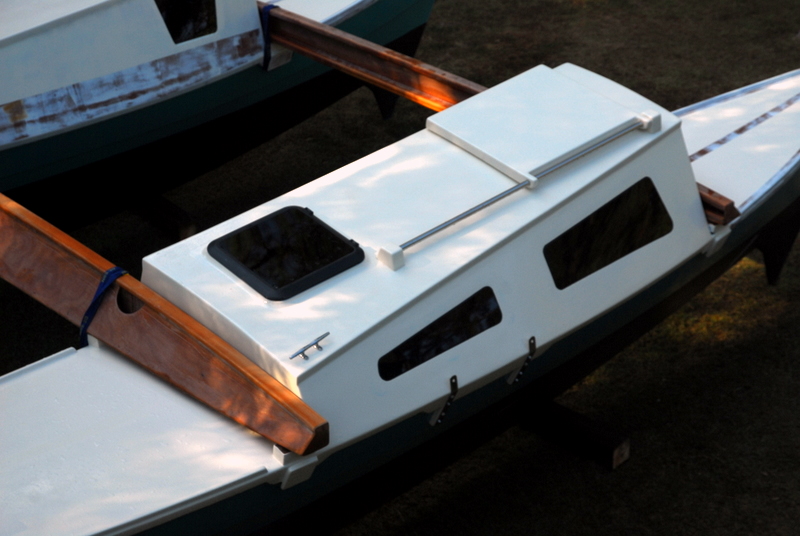
Another project will be finishing the paint job on the stern decks, which have non-skid and primer, but no finish coats.  Then I'll hang the rudders and paint them in line with the bottom paint and topside paint.  And then build the tillers and the tiller bar.


And, there's the small matter of the cockpit and cockpit seats with storage under, and the motor well.  Then forward decks, aft boarding ladder, tramps, etc....  But it's starting to look like a boat, and that's inspiring.


Saturday, September 18, 2010

Port Hull Outside

Yesterday I moved the port hull most of the way out of the building shed.  I was able to install the remaining two windows in each hull this week, despite my injured foot and ankle, so they are now fully "dried-in" and able to be left out in the open.  The starboard hull will come out next week after the sealant has a couple more days to dry.  I'm leaving the stern decks under cover until I get the non-skid and paint on them.  In the meantime, there is a lot of detailing to do on both the deck paint and the green topsides now that I have them out in the open where I can see and work free of the dust in the shed.  Here are a few pictures so you can see one of the hulls unobstructed for the first time:


The first step today was to wash all the dust off:


You can see that the stern deck here is not yet painted, only primed. 


I really like the way these flush-mounted windows came out....


This view shows the companionway hatch and opening hatch forward.  This is one Tiki 26 that will have lots of natural light and ventilation inside.

Wednesday, September 08, 2010

Window Installation Steps

I completed the installation of the two smaller forward, smaller windows at the beginning of the week.  Here are a few photos showing the procedure, as several people have emailed to ask about it since my last two posts.  This is my first installation like this, having learned the technique from David Halladay.  After asking him all my questions over the phone, I proceeded with it and it turned out great and was easier than it sounded.

First, here's a view of the prepared inner flange, as it might not have been clear from my last post how this was built.  The flange itself is made of 6mm ply, and is 1 1/4" wide all the way around the inside perimeter of the opening.  You can see from the shadow that it is set back from the inside of the opening.  This is because of the 6mm plywood spacer sandwiched between the flange and the opening.  This spacer allows a generous bed of the DOW 795 sealant to fit between the acrylic window and the flange.  The space is necessary to allow movement of the acrylic, which expands and contracts at different rates than the wood/epoxy around it.  


The painted area around the window opening is then masked with clean-release tape that won't damage the opening:


The acrylic window, which has been pre-cut and fitted, is now prepared for installation by Super-gluing several flat blocks of plywood to the paper backing that comes on it.  These blocks around the perimeter will hold the window panel flush with the outside of the cabin surface. 


On the inside surface it's best to remove the paper backing and tape it with masking tape so it can be pulled off easily after caulking.  The masking tape is cut back to the edge of the inner flange.  The glue surface of the acrylic and the inner flange is sanded and cleaned prior to application of sealant. 


 This photo shows how the window is held into the exact position in the opening by the glued-on blocks of plywood.  Paper masking tape is applied over the clean-release tape, as it glues better than the blue tape.  Then blocks of wood are Super-glued to the boat on the paper tape to hold the window in the center of the opening. There is a 3/16" gap all the way around the perimeter of the opening, and these blocks will maintain that position while the sealant cures overnight.


The forward window on the starboard side was done at the same time.  After getting the blocks set up, the sealant was applied to the flange and the windows set in place.  At this point the inside edge can be finished from inside the boat and the blue tape on the inside surface pulled away.


The next day, after the sealant has cured enough to bond the window in place, the blocks and the brown paper backing are removed.  Then the painted surfaces and the edges of the windows are re-masked with blue tape.  


The last step is to thoroughly fill the outer perimeter of the window, forcing the caulk into any voids left in the first application.  The excess caulk squeeze-out is then removed, and the perimeter is tooled with a small filleting tool for a nice, slightly-coved seam. 


At this point, the tape is pulled and the installation is done:


No screw holes to crack the acrylic or eventually leak, and no outer frames to trap water that could lead to rot.


Just a clean, flush surface that blends right in to the rest of the cabin sides.  With the huge amount of DOW 795 that it takes to fill between the flanges and the acrylic, there's little chance windows installed this way will ever leak or give any other kind of problems.